In case you are using an internet plan with limited data, then the “Data usage” feature in Windows 11 can be useful for you. It has been specially designed to monitor the usage of your internet data for a specified period of time. Also read: How to check Wi-Fi data usage on Android You can also configure it to get alerts when you are closer to exceeding your allowed data limits. In this guide, we will show you all the steps to monitor and control data usage on your Windows 11 PC and avoid any extra charges from your internet service provider.
How to check data usage in Windows 11
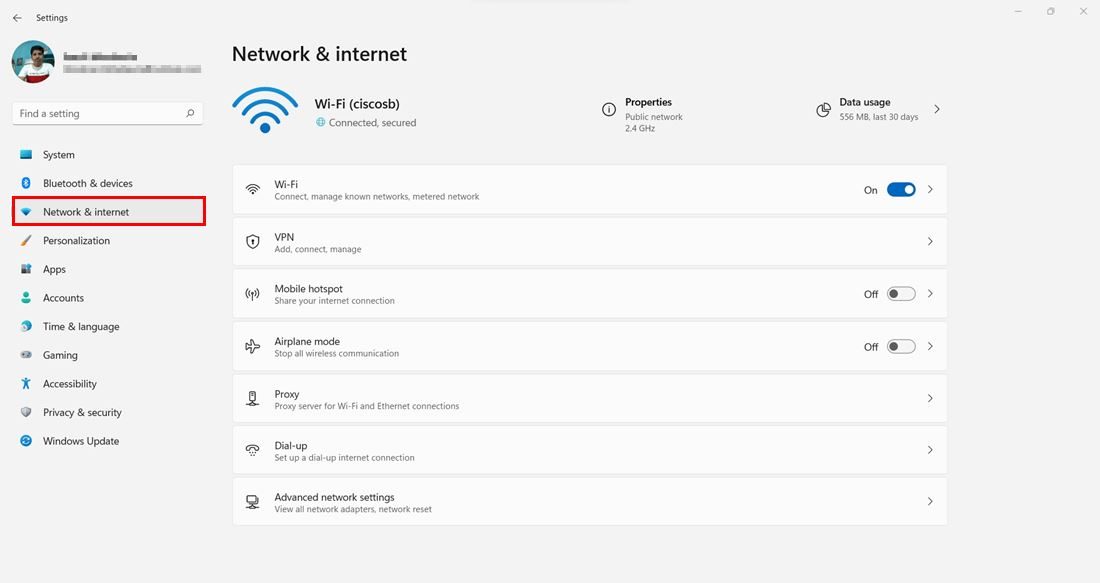
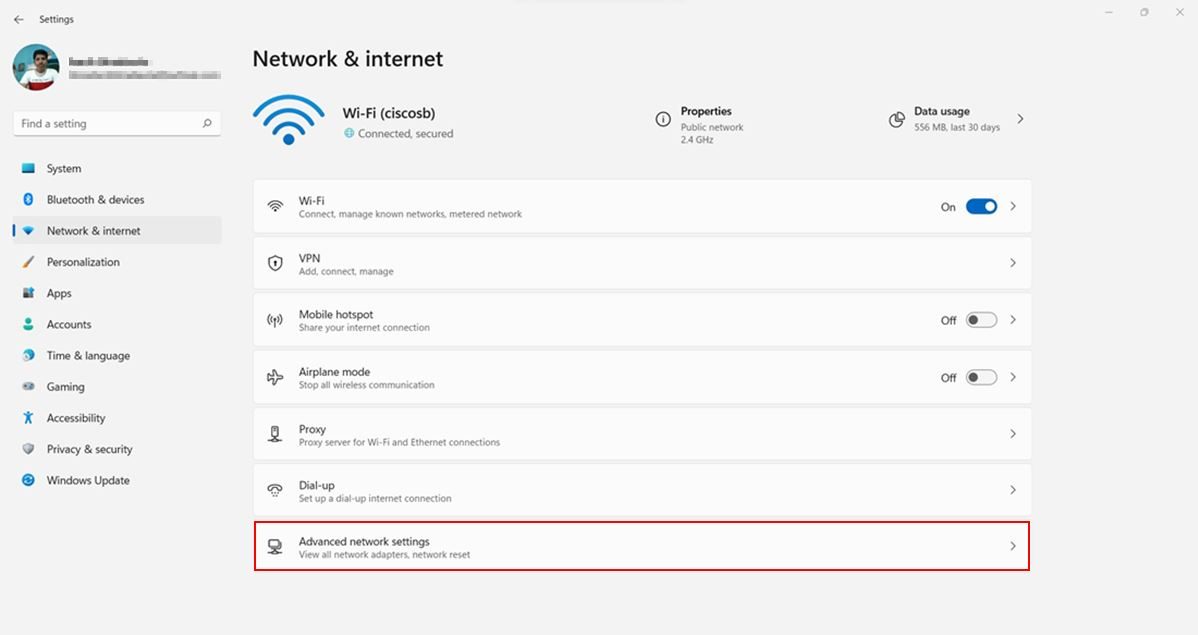
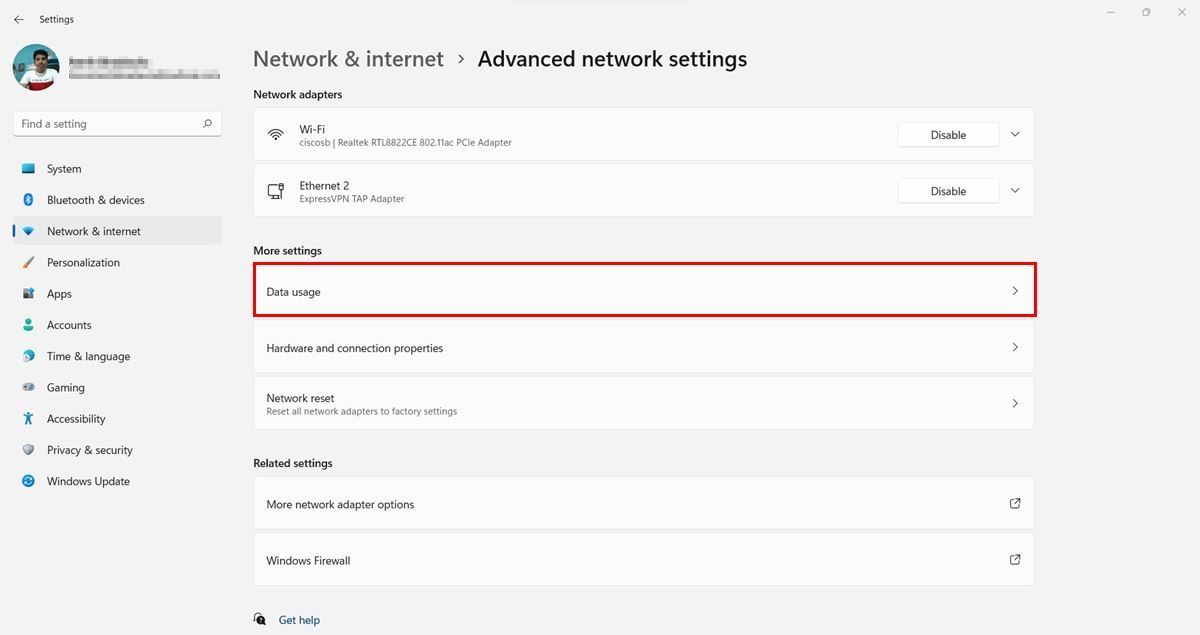
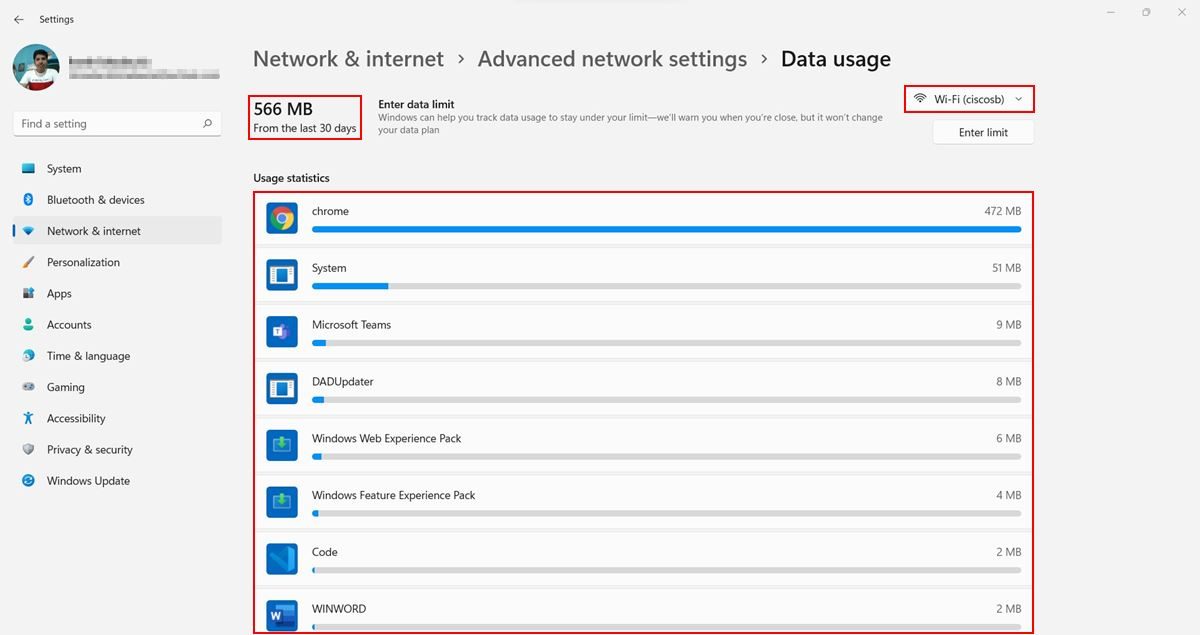
Follow these steps to see your data usage in Windows 11: 2. Go to Network & internet section from the left panel.3. Click on the Advanced network settings option at the bottom. You can also click the Data usage option on the top right to check internet data usage on your current network. 4. Now, under the “More settings” section, click on the Data usage option. 5. A list of apps with their data usage in the last 30 days will appear on your screen. You can also switch between different network options from the top right corner of the screen. This can be useful if you frequently use different types of networks, such as Wi-Fi or Ethernet. Now you will be able to check and review which applications are consuming a major portion of your data as well as the total data used in a specific period of time.
How to reset data usage in Windows 11
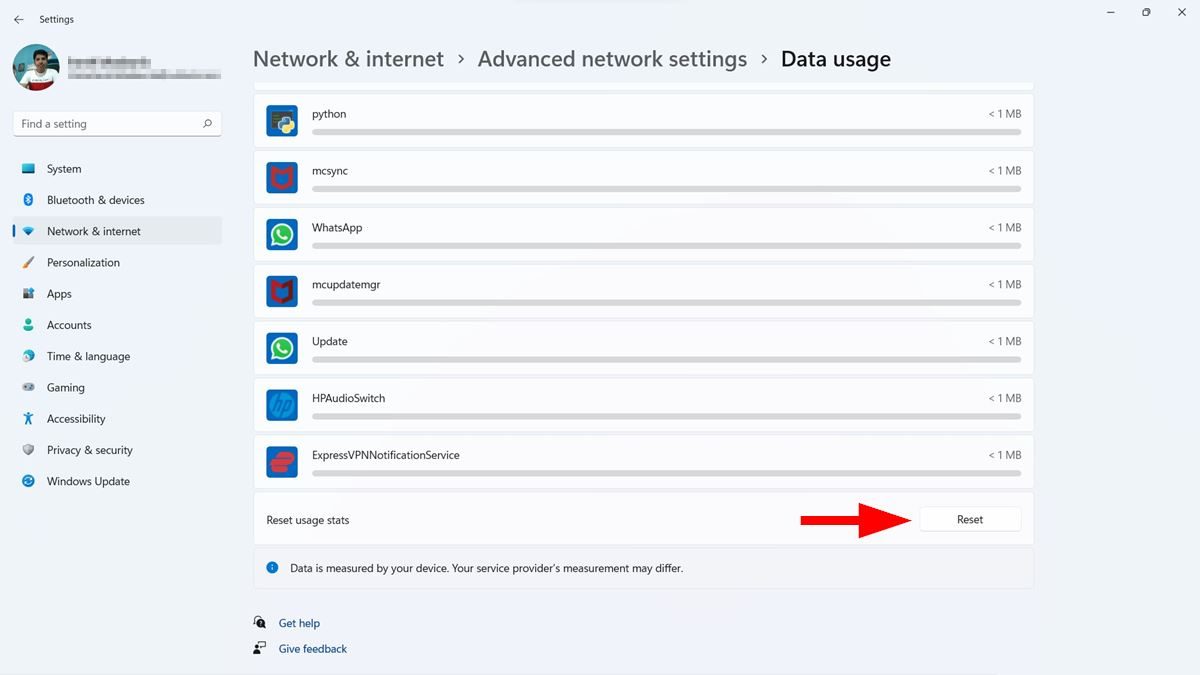
In case you want to reset your data usage counter, here’s how you can do it: 2. Click on Network & internet option from the left panel.3. Now click on the Advanced network settings option on the bottom. 4. Under the “More settings” section, click on the Data usage option. 5. Click on the Reset button next to the Reset usage stats option. All your data usage history will now reset, and Windows will now start a new data usage counter on your PC.
How to set data usage limits in Windows 11
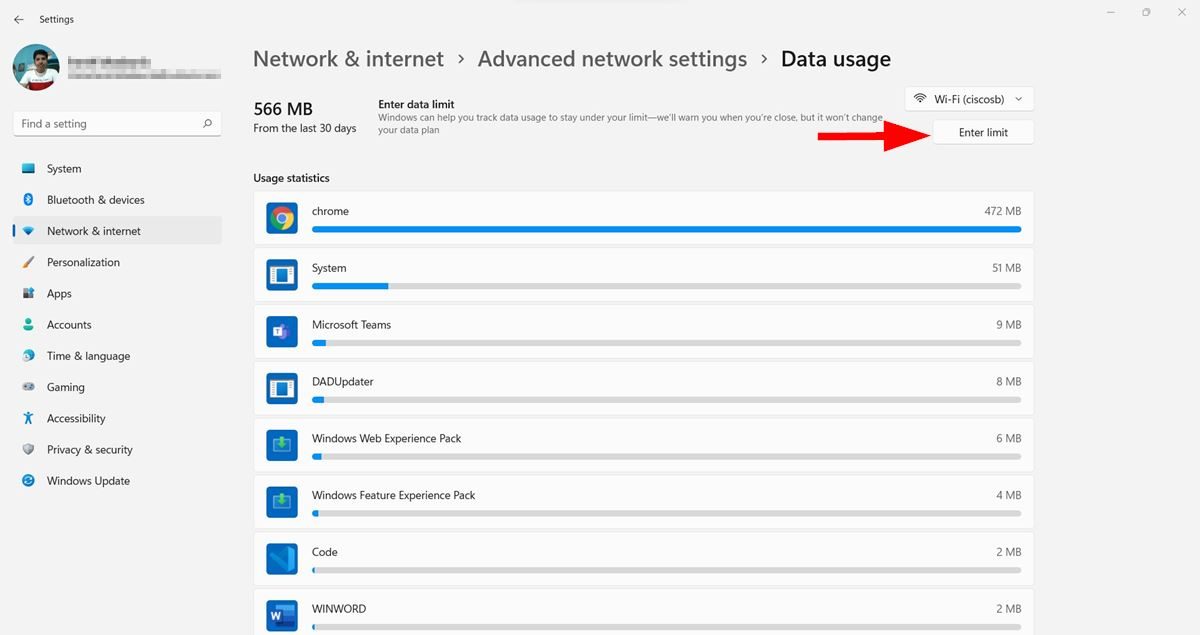
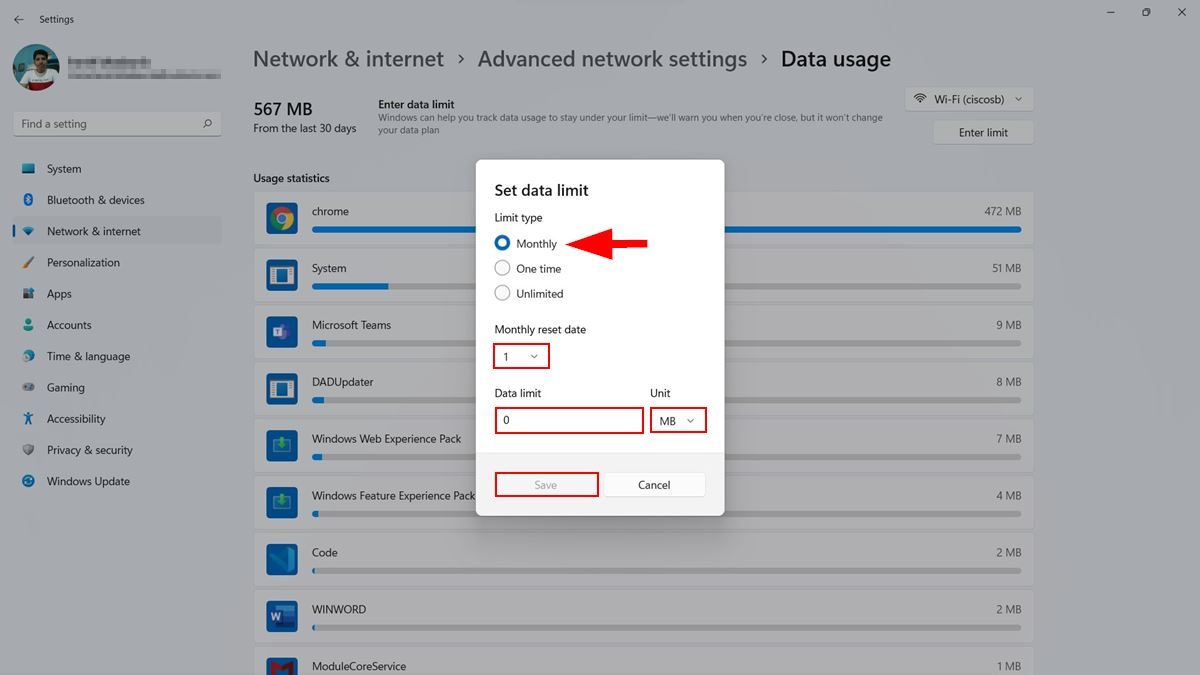
In case you are using an internet service that provides only a limited amount of data, then configuring a data limit can be a good option for you. This will ensure that you don’t exceed your data limits and end up paying additional charges to your internet service provider. Windows will send you alerts when you are close to exhausting your data limits for the month. After you configure these settings, you will be able to review, modify and remove the data limits. To set a data usage limit on your Windows 11 PC, follow these steps: 2. Click on Network & internet option from the left panel.3. Click on the Advanced network settings option on the bottom. 4. Click on the Data usage option under the “More settings” section. 5. Click on the Enter limit button just below the network type drop-down. 6. A popup box will appear on your screen. Here, enter the data limit and then select the limit type according to your preference. 7. Click on the Save button. Now you will be able to check your data usage by accessing this page. Windows will now monitor your data usage and send alerts if your data usage reaches closer to the limit, allowing you to take action accordingly.
How to review the remaining data in Windows 11
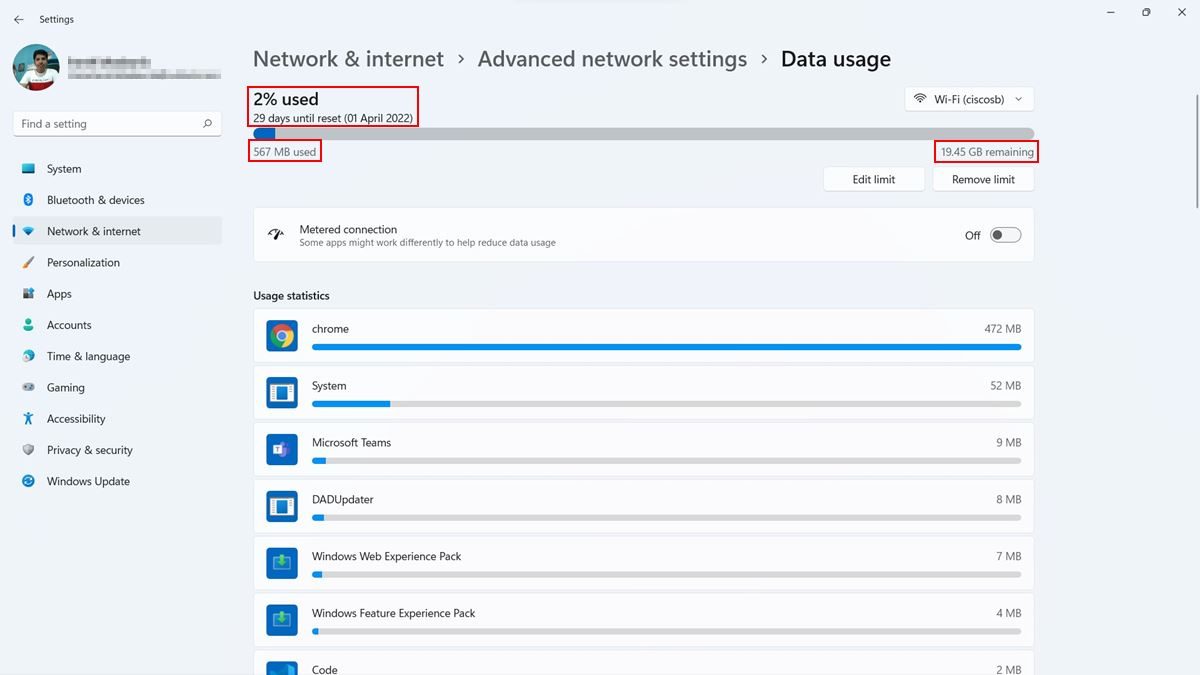
If you want to check the remaining data for your current cycle, then follow these steps: 2. Click on Network & internet option from the left panel.3. Click on the Advanced network settings option on the bottom. 4. Click on the Data usage option under the “More settings” section. 5. You can review the remaining data and usage on this page. You can also check the data usage for other connections by switching the network type from the top right corner. Now you will be able to see your remaining data for the current cycle. You can turn on the “Metered connection” toggle to restrict the usage of your data in the background. You can also modify the data limit by clicking on the Edit limit button.
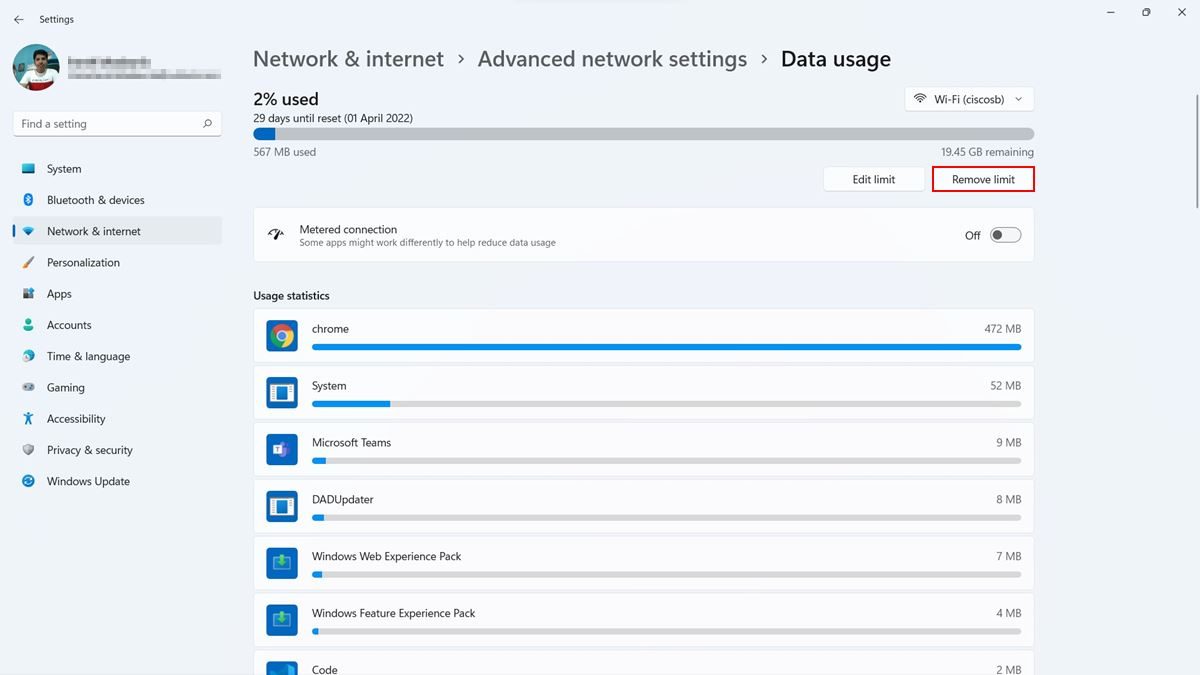
How to remove data limits in Windows 11
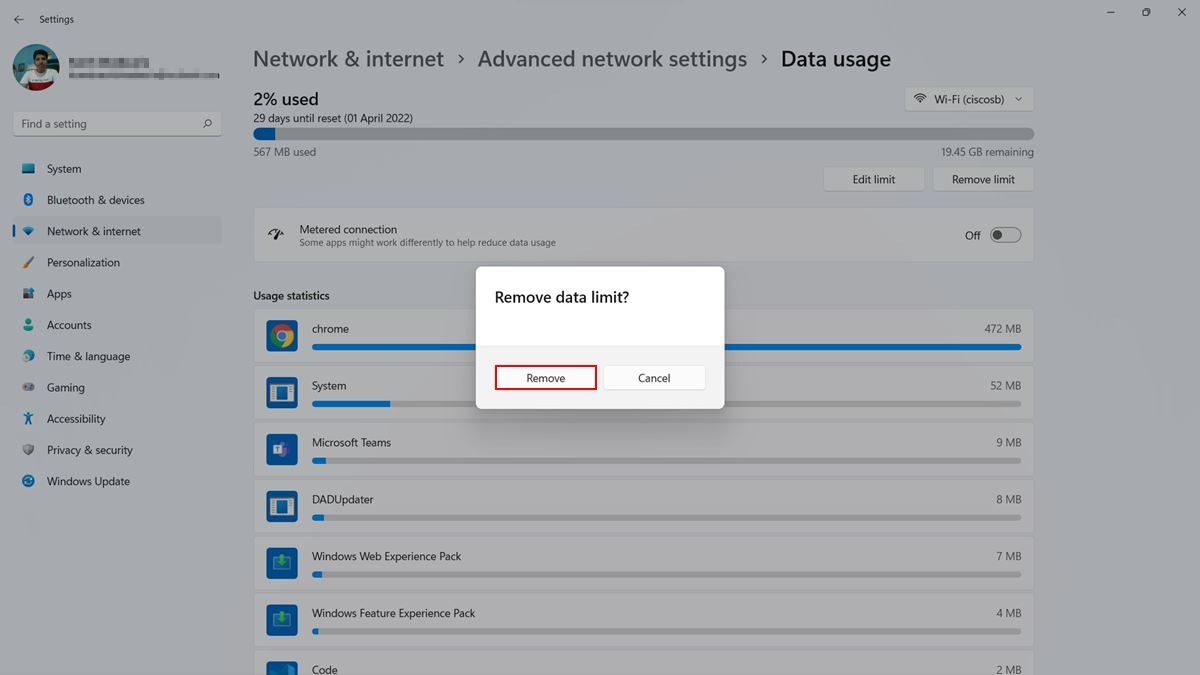
If you want to remove data limits from your Windows 11 PC, then just follow these steps: 2. Go to Network & internet and click on the Advanced network settings option. 3. Under the “More settings” section, click on the Data usage option. 4. Select the network type and then click on the Remove limit button. 5. Click the Remove button when the prompt appears. Now you will no longer receive data limits alerts, but Windows will continue to monitor the data usage. You can also use third-party applications such as Networx and Net Speed Meter to keep track of your data usage and internet speed. Also read: How to enable data saver mode in Google Meet We hope this guide has helped you to track and limit your data usage in Windows 11. If you have any doubts or questions, feel free to ask them in the comments section below.
Δ